
Exclusive Recipes from “Teatime in Paris!” by Jill Colonna
Recreate the exquisite styles and tastes of French pâtisserie in your own home…
Recipe excerpts below from Teatime in Paris! A Walk Through Easy French Pâtisserie Recipes. By Jill Colonna. Published by Waverley Books Ltd.
Purchase the indulgent recipe book from Amazon here.
Each time I aim for a Parisian museum, an art gallery, or any fashion store for that matter, I’m invariably drawn instead to one of the many high-end pâtisseries that are on the rise around the City of Light. They’re my kind of gallery. They just ooze sweet inspiration. With every visit I never fail to be bowled over. I have the highest respect for the delicate precision and savoir-faire of these pastry chefs and chocolate makers.
Unlike myself, they have patience, and their talent and training culminates in the most gorgeous, scrumptious works of art. Their delicious creations, balanced to perfection with intriguing flavours, are sweet memories in the making. Such masterpieces often look too good to eat but, most importantly to the French, the height of pleasure is their lasting exquisite taste.
As much as we admire their stunning pâtisserie, it’s easy to be put off trying to make it. French pâtisserie looks fiddly and time-consuming. Even some of my French friends think making éclairs, religieuses, macarons or tartlets must be hard. The truth is, with some basic techniques and such inspiring ideas at our disposal, it’s possible to recreate our own inexpensive versions at home. If you can make a batch of cookies, muffins, pancakes or scones, you can make French pâtisserie. Having been there myself, I have tried to de-mystify the art of pâtisserie in my book, Teatime in Paris! A Walk Through Easy French Pâtisserie Recipes, which is structured so it starts with the quickest and easiest little cakes, then walks step-by-step through a comprehensive series of pâtisserie recipes to the slightly more technical ones. We finish with the crème de la crème: afternoon treats for special occasions where you can have fun mixing and matching all the previous sections’ recipes.
Most recipes are presented within their historical context, because many French treats have fascinating stories behind them. As many boutiques have their particular specialities, I also included key tasting streets around the city, where you can sample some of the best pastries of that kind in Paris. Finally, the end of the book allows you to jump on the Métro, bus or a water taxi and stop at the likes of the Eiffel Tower, Saint Germain-des-Prés or Le Marais, to join me on a treasure hunt, popping in to many of my favourite pâtisseries along the way.
So are you ready for our pastry-walk through Paris, step-by-step? Let’s get the aprons on, crack some eggs together and bring a light Parisian touch to teatime…
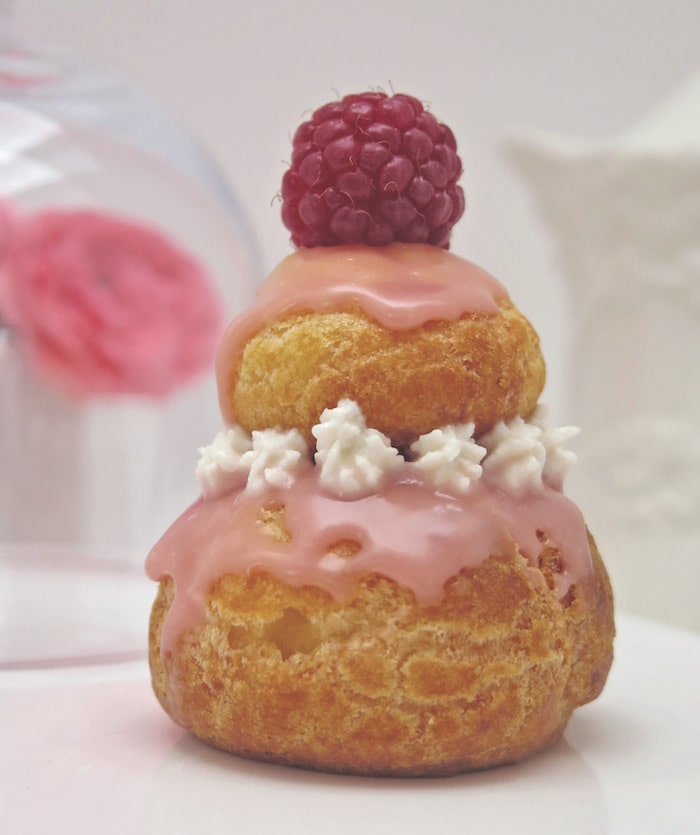
Religieuse rose. Photo © Teatime in Paris
RELIGIEUSE ROSE
Nut-free | Makes 8 | Preparation time: 90 hours | Cooking time: 65 minutes | Temperature: 160°C/320°F fan (Gas 4)
INGREDIENTS
Choux dough
- 150g water
- 100g milk
- 1 tsp sea salt (or fleur de sel)
- 2 tbsps sugar
- 90g butter
- 150g flour (plain, all-purpose)
- 4 eggs
Rose pastry cream
- 500g full-cream milk
- 15g rosewater (see note on page 58)
- 6 egg yolks
- 40g cornflour (cornstarch)
- 80g sugar
Lychee cream
- 60g whipping cream (32–35%)
- 15g lychee syrup (by Monin)
- 40g sugar
- 125g (½ tub) mascarpone, chilled
Glaze
- 2g gelatine (1 x 2g sheet)
- 80g single cream
- 20g water
- 20g honey
- 120g white chocolate, broken into bits
- 1 tsp rosewater (see note on page 58)
- Pinch of pink colouring
- 8 fresh raspberries
What is a religieuse? It’s a nun, but somehow the name was given to a pastry! It was invented by Frascati, an Italian pastry chef, in Paris in 1856. It uses the same methods of preparation as a chocolate or coffee éclair but is presented differently: a large choux bun as a base with a smaller choux bun on top, filled with pastry cream, coated with a shiny glaze and finished off with a ruffled collar to stick them together.
The ruffle between the choux puffs is traditionally made with a French buttercream (crème au beurre) but instead, many chefs opt for mascarpone cream, which is light and easy to make. You can substitute lychee for rose syrup.
1. Preheat the oven to 160°C/320°F fan (Gas 4).
2. Prepare the choux dough following the instructions on the opposite page, then pipe out eight large choux puffs (about 5cm / 2” diameter) using a 12-14mm (½”) plain tip on parchment paper or a silicone mat on a baking tray. Bake for 25 minutes. On another lined baking tray, pipe out eight small choux puffs (about 2cm / ¾” diameter) and bake for 15 minutes. Once baked, remove from the oven and cool them on a wire rack.
3. For the rose pastry cream, put the milk in a saucepan, add the rosewater and gradually bring to the boil over a low-medium heat. Meanwhile, in a mixing bowl, hand-whisk the yolks with the sugar until pale then whisk in the cornflour until pale, smooth and creamy. As soon as the milk starts to boil, pour half of it onto the yolk mix, whisk again and transfer back to the saucepan. Whisk continuously over a medium hear until thickened. Take it off the heat as soon as you have the first couple of thick bubbles. Once thickened, place cling film directly on top of the pastry cream and leave to cool. Chill in the fridge for an hour.
4. Make the lychee cream: whisk the cream, then add the syrup and gradually add the chilled mascarpone until the cream is stiff. Transfer to a piping bag with a small star or flower nozzle to decorate later and chill until needed.
5. Using a sharp knife, pierce a hole in the bottom of the choux puffs and pipe in the rose cream.
6. To glaze, soak the gelatine in cold water for 10 minutes. Heat the cream, water and colouring in a saucepan until boiling, then take off the heat. Squeeze the excess water from the gelatine, and add it to the hot cream. Mix briskly with a hand whisk until melted. Add the white chocolate and mix until melted. Add a few drops of rosewater. Set aside to cool for 15-20 minutes, then dip in the rounded tops of the choux buns.
7. Stick the small choux bun on top of the bigger one and crown it with a raspberry. Pipe out the mascarpone cream as a collar between the head and the body to ensure it stays straight.
8. Leave to chill in the fridge and eat fresh on the same day. Serve with Darjeeling tea.
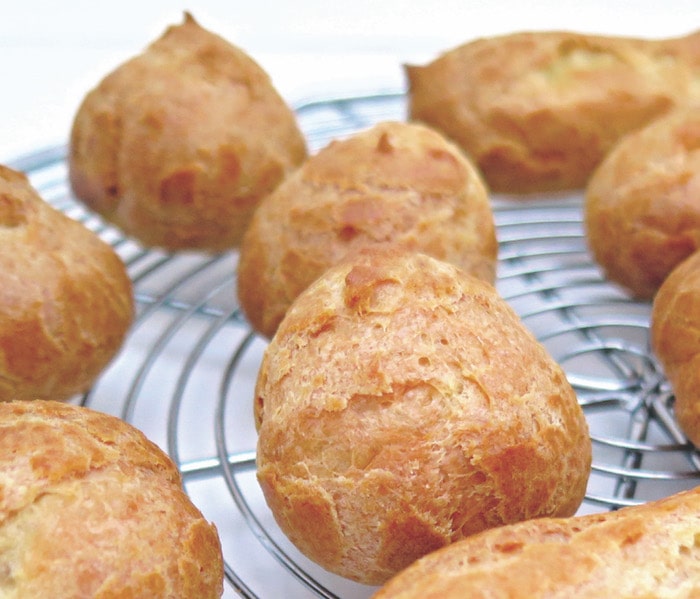
Choux Pastry. Photo © Teatime in Paris
Choux Pastry
Nut-free | Makes approx 660g dough, around 50 choux puffs or 16 éclairs | Preparation time: 15 minutes | Cooking time: 15 – 30 minutes | Temperature: 160°C/320°F fan (Gas 4)
INGREDIENTS
- 150g water
- 100g milk
- 1 tsp sea salt (or fleur de sel)
- 2 tbsps sugar
- 90g butter (cut into small cubes)
- 150g flour (plain, all-purpose)
- 4 eggs (or 3 larger eggs), chilled
Choux dough can also be made without the milk: instead just use 250g water. This is a large quantity but as it keeps in the fridge for up to four days, I find it handy to have the dough still in its piping bag, ready for a quick something-I-rustled-up-earlier treat. Otherwise, just halve the quantity. This recipe may look long but I’m taking your hand here so that you can have this mastered in no time!
1. Preheat the oven to 160°C/320°F fan (Gas 4). Boil the water, milk, salt, sugar and butter (cut roughly into bits / cubes) in a large saucepan. Cut the butter up into pieces: if you put in big slabs, by the time it has melted the liquid will have evaporated too much.
2. Once it’s boiling, remove from the heat and quickly add the flour. Mix well for a couple of minutes with a wooden spoon, spatula or sturdy balloon whisk, until the dough is smooth and naturally comes away from the sides of the pan (see photo below, third from left). Transfer the dough to a mixing bowl and leave to cool for about five minutes. Gradually add the eggs, incorporating them well, one by one – I mix by hand using a wooden spoon or rubber spatula but it’s just as quick using an electric stand mixer with a flat beater. After each addition, the dough will break up and look rather sloppy (see photo below, second from right). Don’t worry. Keep mixing well, incorporating air into the dough until you’ve a smooth, thick paste.
3. Transfer the dough to a piping bag fitted with a tip (depending on the recipe, but usually a 12mm (½”) tip is great). At this point you can pipe out straight away or keep the dough. refrigerated in the bag for up to four days.
4. Pipe out small heaps (according to the recipe) on baking trays covered in baking paper/parchment or a silicone mat. Push down the dough, now and again, using the pastry scraper. Leave 5cm (2”) between each mound, as they’ll spread out during baking. They do have a funny shape when you pipe them, but in the oven you’ll see them even out and puff up into little balls. If they have pointed tops, tap them down lightly with your fingertips.
5. Bake in the oven for 15-30 minutes, according to the recipe. Don’t open the oven door during baking, as they might collapse! Wait until they’re cooked enough and have turned from golden to mid-brown, then they’re ready to remove from the oven. Leave them to cool well before garnishing (you can even keep them until the next day).
FOR PERFECT CHOUX
1. To pipe éclairs, I like using a 12mm (½”) serrated tip, although a plain tip will give you just as good results. For standard éclairs pipe out strips of about 12cm (4¾”) long, as they’ll puff out during cooking.
2. If you have choux pastry in a piping bag with a serrated tip and later want to change it to a plain tip, there’s no need to change bags: you can simply pop another tip on top and pipe away (see photo at bottom, second from left).
3. Ensure the choux pastry is cooked enough. If they’re slightly undercooked, they risk flattening when you take them out of the oven.
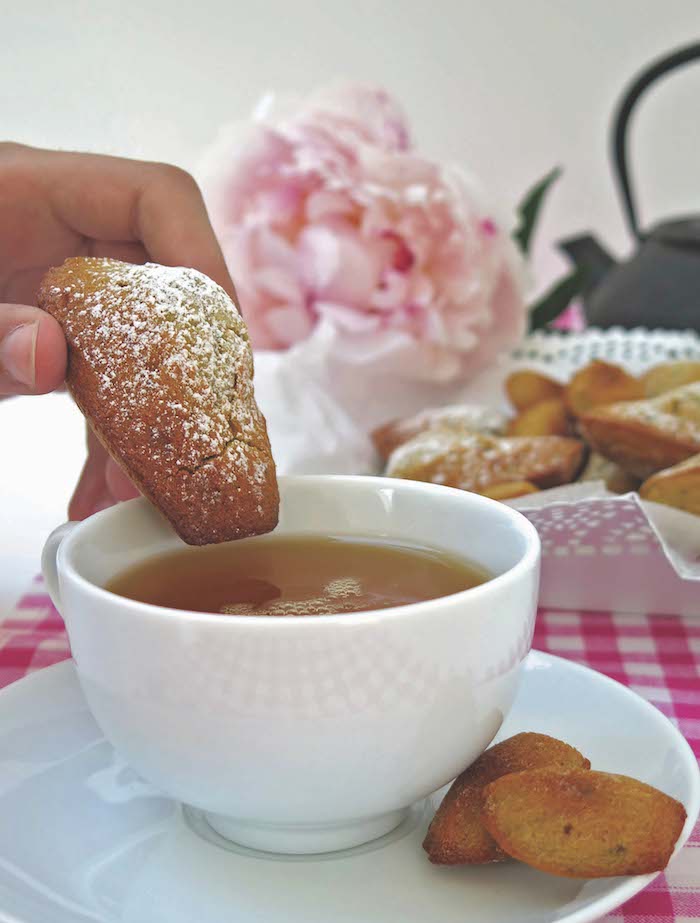
Madeleines. Photo © Teatime in Paris
Honey, Rose & Green Tea Madeleines
Nut-free | Makes 18 classic or 48 mini-madeleines | Preparation time: 20 minutes | Resting time: 30 minutes (or for two hours minimum – best overnight) | Cooking time: 10 minutes | Temperature: 180°C / 360°F fan (Gas 6)
INGREDIENTS
- 2 tbsps milk
- 1 tbsp rosewater (see note opposite)
- 1 tsp vanilla extract
- 100g butter, melted
- 1½ tbsps honey
- 60g caster sugar
- 2 eggs
- 120g flour
- 1 tsp baking powder
- 1 tsp ‘matcha’ green tea powder
This delicate scallop-shaped teacake (or friand for our Australian and New Zealander readers) not only has its own Square (Place de la Madeleine of course), but it’s also the address of the Parisian gourmet store Fauchon, which has some of the best madeleines (and éclairs and macarons) in Paris.
How many times have we experienced ‘la madeleine de Proust’ when biting into something, and we suddenly – and involuntarily – remember an emotional moment from our childhood? My soggy egg-and-tomato sandwiches on a rained-out Scottish beach, with stewed tea in a flask, watching the view from the car, doesn’t quite have the same sweet appeal as the French metaphor that arose from Marcel Proust’s novel, À la Recherche du Temps Perdu (In Search of Lost Time), but it’s a happy memory that provokes the most pleasurable goosebumps around my taste-buds.
Madeleines aren’t originally from Paris; otherwise, with their traditional hump they could’ve been called Notre-Dames or Quasimodos. So why madeleines and not hunchbacks? Instead, they’re a speciality of Commercy, where the name madeleine stuck from the 18th century onwards.
The original madeleine was said to have used rosewater, and, since there’s matcha do about infusing tea into cakes in Paris these days, add a teaspoon of ‘matcha’ green tea powder instead of the more classic lemon flavour.
If you prefer your madeleines with the traditional ‘hump’ in the middle, then prepare the mixture the day before and leave the batter to rest overnight in the fridge. Another tip to give your madeleines the perfect ‘hunchback’ look is to chill your moulds first.
Serve them shortly after baking, with a cup of light Darjeeling, green tea, or – as in Proust’s novel – dip it into a herbal infusion like ‘verbena’ and walk down memory lane…
1. Heat the milk together with the rosewater, vanilla and honey. Whisk the eggs and sugar in a bowl until they’re light and frothy.
2. Melt the butter in the microwave or in a saucepan, or make beurre noisette (browned butter). For the latter, cut the butter into small chunks and gently melt completely in a small saucepan over a medium heat. After about five minutes, or as soon as a foam begins to form, turn down the heat to low and leave for just a couple more minutes – be careful not to burn it. Remove from heat and leave to cool for ten minutes.
3. Add the warm, fragranced milk to the egg mix, then whisk in the flour, baking powder and melted (or browned) butter. Mix in the green tea powder.
4. Leave the mixture to rest in the fridge for 30 minutes. If you prefer the characteristic French ‘hump’, leave the mixture for at least two hours or covered in the fridge overnight (best option).
5. Chill the moulds in the fridge. Preheat the oven to 180°C/360°F fan (Gas 6). Transfer the mixture to a piping bag if filling for mini-madeleines or, using a spoon for the classic size, fill the mixture into cold silicone madeleine moulds about 2 / 3 ¾ to the top. Place on a baking sheet and bake in the oven for ten minutes (classic moulds) or 6-7 minutes (mini versions).
VARIATIONS
For lemon madeleines, replace the rosewater with lemon juice, add the zest of an unwaxed lemon and omit the green tea. For chocolate madeleines, replace 20g of the flour with 100% unsweetened cocoa powder.
ROSEWATER
There are several recipes using rosewater in the book. I normally use ‘light’ rosewater, which has a concentration of 3% essence. Take care which brand you buy – smaller bottles tend to contain a much more concentrated essence. If using an extract or essence, which is a concentrated flavouring, you will only need a few drops. And it’s essential to add it slowly and taste as you go.
Purchase the indulgent recipe book from Amazon here. Check out Jill’s Mad About Macarons website.
Want to be inspired by more French foodie experiences and enjoy classic French food, wine and recipes? Head to our sister website on Taste of France here.
From France Today magazine
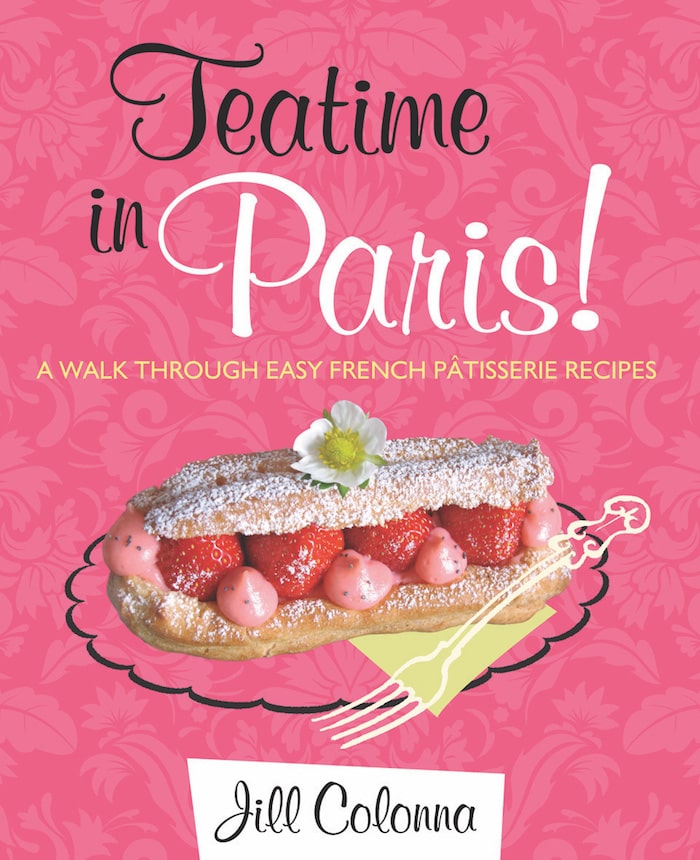
Photo © Teatime in Paris!
Share to: Facebook Twitter LinkedIn Email
More in baking, patisserie
Related Posts


Leave a reply
Your email address will not be published. Required fields are marked *
REPLY